Call Us
Goosnargh:
Lytham Road:
Kirkham:

Your Dog’s Dental Health

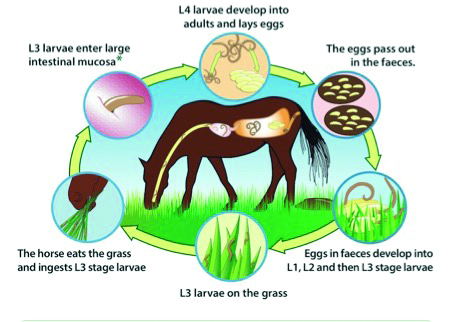
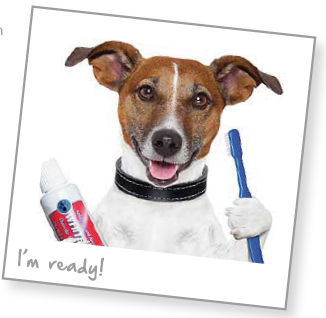
Your dog’s dental health is really important.

Why do you need to brush your dog’s teeth?

Food particles and bacteria collect along a dog’s gum line and form soft deposits called plaque. Over time, the plaque turns into rock-hard tartar. If tartar is not removed from the teeth, it will eventually inflame your dog’s gums causing pain, therefore looking after your dog’s dental health is really important.

As the inflamed gums begin to separate from a dog’s teeth, pockets form in which more bacteria grow, causing periodontal disease to worsen. At this point, dogs can experience severe pain, lose teeth, and form abscesses in their mouth.

Your dog will not be able to tell you if they are in pain or have toothache.

Dogs can develop a bacterial infection that can spread through the bloodstream to the kidneys, liver, heart or brain causing more widespread illness and disease.

Periodontal disease is irreversible, so now is a great time to get started on a regular oral-care regime for your dog. Prevention is the key to keeping dogs healthy and happy.

You will reduce the chances of putting your dog through an anesthetic and  dental surgery later in life if you look after their teeth. They would prefer not to have an operation and you will save lots of money!


The equipment you will need: 

  • A pet toothbrush with medium bristles (or a finger brush initially).
  • A quiet area with few or no distractions.
  • Plenty of patience.
  • Dog toothpaste – human toothpaste is toxic to dogs.
  • Some water.
  • You can get a toothbrush kit from any of our surgeries.

Step by Step Guide:

Dog tooth brushingGet your dog used to the toothpaste 

  • Wash and dry your hands and smear a little bit of dog toothpaste on your index finger.
  • Let your dog lick the toothpaste from your finger.
  • Repeat two or three times a day.
  • Once your dog is eating the toothpaste well off your finger, begin to start lifting your dogs lips and holding their muzzle. Your dog needs to get used to you touching their mouth (This may take some time, as it can be quite worrying for your dog at first, ensure you do not force or restrain them and that they are happy with being held).
  • Move on when your dog is happy with you touching and holding their mouth and eating their special toothpaste.

Get your dog used to having something in their mouth 

  • Smear your index finger with toothpaste.
  • Gently rub your finger over your dog’s teeth and gums.
  • Do this slowly and do not put your finger in further than your dog is comfortable with, and take care with your fingers please.

Introducing your dog to the toothbrush 

  • Wet the toothbrush with water and then smear it with toothpaste on top of the bristles.
  • Let your dog lick some of the toothpaste off the bristles to get used to the feeling.
  • Gently hold your dog’s mouth around the muzzle to get them used to you holding their mouth and do not let your dog chew the brush.
  • Put your hand across your dog’s nose and lifting their lips, gently brush their canines (the big, pointy teeth) up and down.
  • Start by angling the brush towards the gum line and brush away from the gum towards the tip of the tooth.
  • At this stage avoid the incisors (the small teeth at the front of my mouth) and holding the front of your dog’s nose, as this is the most sensitive area of their mouth.

Brushing your dog’s back teeth 

  • Start with brushing your dog’s Canine teeth up and down as above.
  • Slowly move along to the teeth behind the canines, using a circular motion.
  • Only go as far as your dog is happy with and brush both sides of their mouth.

Brushing all of your dog’s teeth 

  • Always start with the Canine teeth and then the back teeth, and we will finish with brushing the sensitive incisors (your dog may sneeze when you brush their incisors!).
  • To brush the front incisor teeth, hold your dog’s mouth around the top of the muzzle and gently lift the upper lip with your thumb and forefinger, to reveal the incisor teeth.
  • Gently brush the front teeth up and down.
  • Gradually build up the amount of time you spend brushing until you reach two to three minutes. For maximum protection, brush every day, if you can.

Hints & Tips

  • Dog dental tips
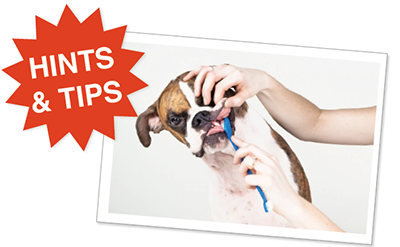
Keep your sessions short – 3 minutes is plenty twice a day once your dog has been trained to have their teeth brushed.
  • Your dog is an individual, go at their pace and please remember to give them lots of praise.
  • Use three pea-sized blobs of dog toothpaste – one each for the left, right and front of the mouth.
  • Take care putting your fingers into my mouth.
  • If your dog is aggressive or prone to biting, do not try to brush their teeth (please seek advice from a behaviourist).
  • Repeat each stage for approximately five days before moving to the next step so your dog is comfortable and understands each stage.

Don’t hesitate to speak to one of our vets or nurses about your dog’s dental health.

Our Registered Veterinary Nurses offer free pet dental checks and are a valuable source of advice.

PetPlan Veterinary Awards 2020

The PetPlan Veterinary Awards 2020 are now open!

2020 marks an amazing 21 years of these awards celebrating excellence within the veterinary industry.

The Petplan Veterinary Awards recognise the fantastic work that goes on in veterinary practices across the UK. Petplan has worked closely with the veterinary profession for over 40 years and hosts these independent industry awards to recognise the hard work and dedication of veterinary staff caring for our pets.

If you think that the Oakhill Veterinary Centre practice or someone in our practice team deserves to win, click here to complete the nomination form.

Thank you!

No Deal Brexit

Exporting animals and animal products in a no-deal Brexit…

In the event of a no deal Brexit all export to the EU will require Export health certificate (EHC), which will need applying for in advance. Export health certificate can be found on the gov.uk website: https://www.gov.uk/export-health-certificates

Goods may require checks at border inspection posts (BIP), which are currently being built in preparation for leaving the EU. If your product is required to go through a BIP it will occur at the first EU country it enters. You will have to ensure the BIP can accept your product type and that your EU based import agents has notified them (through the EU’s Trade Control and Expert System (TRACES)) when your consignment is arriving (verifying with the BIP, beforehand, how much notification they will require). Check the list of existing EU BIPs, and the products they accept, as your trade route may need redirecting.

If your product isn’t required to go through a BIP, ensure your EU based import agent notifies the competent authority of the EU state of the products destination and the EU port/airport, within the time limits set out by the competent authority.

For exporting to the EU you will have to comply with wider HMRC guidance on custom requirements:

  • Your business needs a EORI (economic operator registration and identification) number that starts with GB
  • You need to check your imported has an EU EORI number. If you are exporting to your own business within the EU you will need to get an EU EORI number from customs authority in any EU country.
  • Decide who will make the export declaration (will you do it yourself or hire someone – this will involve submitting a customs declaration https://www.gov.uk/guidance/customs-declarations-for-goods-taken-out-of-the-eu?step-by-step-nav=e169b2ac-8c90-4789-8e6c-3657729e21b2)
  • Decide if you want to export your goods using transit, you may be able to use common transit convention to simplify how your goods pass-through customs and when your importer pays customs duties.
  • Check the rate of tax and duty for your goods
  • Check what you need to do for the type of goods you export
  • Find out how changes to VAT will affect you
  • Decide who will transport your goods outside the UK

There is unlikely to be any change to exporting products to non-EU countries. However, if the product transit through the EU you will need both an EU transit certificated and EHC for the final destination. You will also need an EU importer who will take responsibility for the consignment while transiting the EU.

The European Commission will vote, before Brexit, whether to list the UK as a third country and allow exports of live animals, POAO (products of animal origin) and ABPs (animal by products).

You will need to be listed as an approved establishment with the EU if you:

  • Export POAO incl. red/white meat, fish/ fish products, dairy or egg products.
  • Some live animals and ABPs direct to the EU
  • Supply other UK establishments that export their goods to the EU

The current list of UK ABPs premises will be accepted in a no deal Brexit.

Documents for transport issued by the UK will only be valid in the UK and NOT in the EU.

If you wish to discuss further, please get in touch with our Export Team.

Please visit the following link for more information: https://www.gov.uk/guidance/exporting-animals-animal-products-fish-and-fishery-products-if-the-uk-leaves-the-eu-with-no-deal

Sneaky peek at our new small animal facilities?

Join us for a behind-the-scenes look at the brand new small animal facilities at our Goosnargh branch on:

Sunday 13th October 2019
1pm – 4pm

at Oakhill Veterinary Centre, Langley Lane, Goosnargh, PR3 2JQ

  • Practice tours 
  • See behind the scenes at your local vets
  • Meet the team
  • Refreshments
  • Demonstrations
  • Children’s activities

PLUS there’ll be a FREE PRIZE DRAW to be in with a chance of winning a Chocolate Hamper!

We hope you can join us!

Pippa – Patent Ductus Arteriosus

Pippa
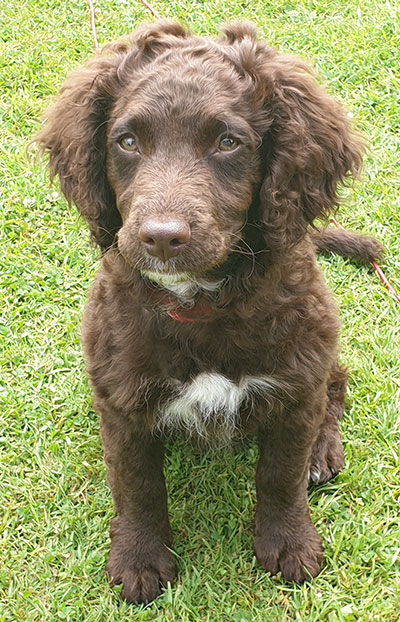
Pippa, a beautiful Cockerpoo, was diagnosed at 4 months of age with a serious congenital heart defect known as Patent Ductus Arteriosus (or PDA for short) after a heart murmur, that was picked up during her initial vaccination appointment, failed to disappear.

A PDA is caused by a blood vessel that connects the body’s major artery (aorta) to the main vessel that supplies the lungs (pulmonary artery) failing to close after birth as it should normally do. This can lead to poor growth, damage to the lungs, heart failure and ultimately death with 50% of cases not even seeing their 1st birthday.

Pippa’s diagnosis was made at our Conway Drive branch by vet, Giles Lambert, performing an ultrasound scan of her heart which showed the PDA and the abnormal blood flow that it was causing. The scan also revealed that her heart was already becoming enlarged because of the PDA, a worrying sign that heart failure would develop if left for too long.

Fortunately for Pippa she was able to be referred to specialists at Liverpool University’s Small Animal Teaching Hospital. A month after her diagnosis she underwent an operation to place a small device into the PDA (via a catheter in one of her back legs) to stop blood flowing through it.

Pippa PDA Angiogram

Pippa PDA
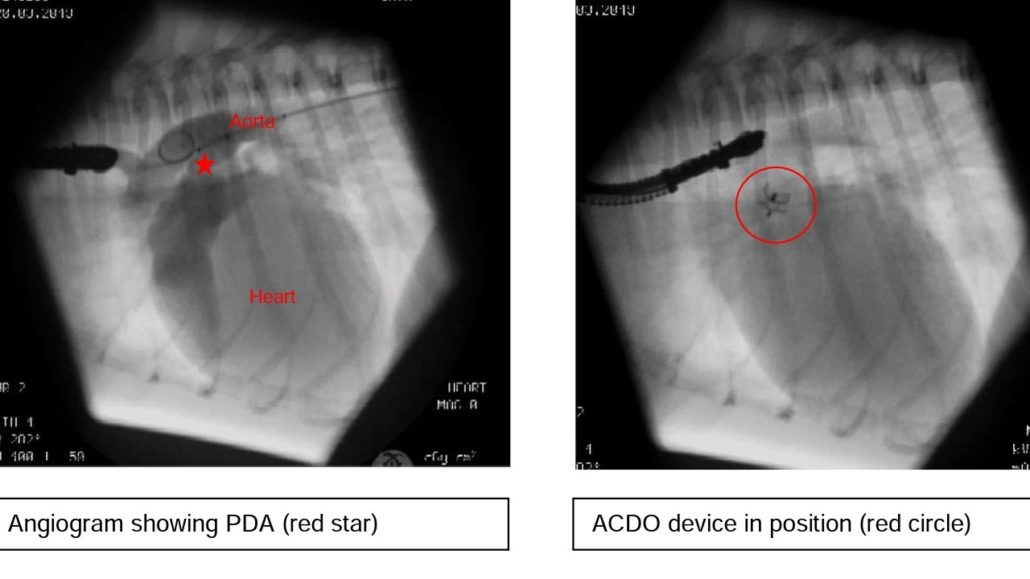
The procedure has been a complete success so far and Pippa can hopefully now look forward to a completely normal and lengthy life!

Thank you to Pippa’s owners for letting us share her story.

Atypical Myopathy

Atypical Myopathy is a very serious and often fatal disease that horses can get when out at pasture from consuming sycamore seeds.

What is Atypical Myopathy?

An acute, severe rhabdomyolysis (a severe form of azoturia / tying up) that occurs independently of exercise. The disease causes extreme muscle cramping and often irreparable muscle damage.

Muscle enzymes that are released when the muscles are damaged, cause multiple organ failure.


What is the cause?

A toxin called Hypoglycin-A found in sycamore seeds. Ingestion of these seeds at pasture causes Atypical Myopathy. Outbreaks may occur with multiple horses affected in one geographical area within a few weeks of each other.


What are the clinical signs?

The onset of Atypical Myopathy is acute. Early presentation of the disease may be confused with colic or laminitis. Horses may be found dead, but more frequently they start by showing signs of weakness, stiffness, falling over, lying down more than usual, sweating, apparent sedation or depression, fine muscle tremors, dark brown urine that can look like blood and respiratory distress.

Progression to recumbency is often rapid and once at this stage, the prognosis is hopeless. Mortality is seen in 70% – 90% of cases within 3-5 days.


Who is at risk?

The condition predominantly affects young animals, but all horses are at risk. No sex or breed predisposition has been described, but to date, no cases of the disease have been reported in donkeys. Underweight body condition is associated with increased risk.

Overgrazed pastures and poor quality grazing gives a greater risk of disease.


What can I do to prevent Atypical Myopathy?

Clear fields and water troughs of sycamore seeds, leaves and saplings. If this is not possible, do not allow horses to graze affected paddocks or fence off affected areas. Do not over graze paddocks and avoid overgrowth of weeds on pasture. Provide hay if the fields are low on grass and where possible consider stabling horses over night.


What to do if you think your horse may have Atypical Myopathy

Ring your vet immediately. Try and move the horse to a stable with deep bedding in case they want to lie down. If you notice your horse urinating try and catch a urine sample with a clean jar or mug so that we can test it.

RAM FERTILITY & MOT

Ram Fertility & MOT

With tupping time approaching it is time to take an important look at your rams. Their performance over a few months of the year will contribute significantly to the profitability of your sheep business over the next 12 months.

Ram fertility testing
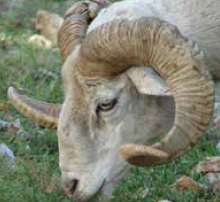
The rams will have to work hard during the tupping period and if they’re not on top form fertility is likely to suffer. A general MOT is the best place to start – are the rams healthy and can any problems be corrected? After which, we need to know if they are fertile. Checks need to be made early in the run up to tupping to allow plenty of time to correct any problems.
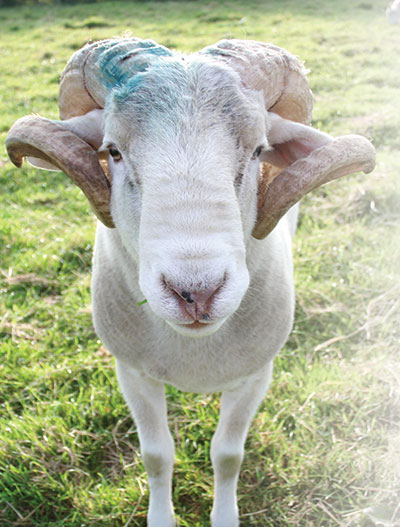


RAM MOT – the 5 ‘T’s

How to check your ram…

tup testing• TOES

Check his locomotion, arthritis and feet.

• TEETH

Check for under/overshot teeth, gaps and molar abscesses.

• TESTICLES

Measure and check firmness and for lumps and bumps. 
Did you know that the testicle tone of a healthy ram, should be that of a tensed bicep?

• TONE

Aim for body condition score of 3.5 – 4.

• TREAT

Vaccinations (Clostridia, Pasteurella, Louping Ill), parasites and lameness.

After a general MOT, we need to know if the ram is fertile….

WHAT DOES RAM FERTILITY TESTING INVOLVE?


• EXAMINATION OF GENITALIA – the testes are examined for any abnormalities. Scrotal circumference is measured, when it comes to fertility the bigger the better!


• COLLECTION OF A SEMEN SAMPLE – a semen sample is collected by inserting a probe into the rectum and applying a voltage. This may make your eyes water but causes minimal discomfort.


• EXAMINATION OF SEMEN/SPERM SAMPLE – any abnormalities such as low sperm count, poor swimmers, abnormal sperm and infection can be seen. The sample is examined on site so we can give you an answer straight away.


For more information or to book a ram in for tup testing, please contact the Oakhill Farm Team.


Can we fight resistance?

Can we fight resistance? Responsible equine worming.

The approach to worming of the general horse population has changed significantly over the years. Unfortunately there are no new worming products in the pipeline and resistance to the current wormers is becoming more and more of an issue. 

Testing to identify those horses (approximately 30%) that carry a worm burden significant enough to warrant worming is taking over from the ‘blind worming’ approach that we have previously taken. 

In this ‘test before you treat’ approach, the positive tested horses then need to be wormed with the correct product, dependent upon the time of year. Ensuring you are administering the correct dose for the horse’s weight is really important as well because underdosing contributes to resistance.

The basic life cycle of an equine roundworm is shown in the picture below. 

roundworm cycle

Stage 1:  Eggs shed onto pasture develop, under the right conditions, into larvae. 

Stage 2:  Larvae are then eaten by the horse on grass where they enter the large intestine. These larvae mature to produce eggs. 

Stage 3: Eggs are passed out in faeces, back to Stage 1.

Our new Equine Worm Control Plan is now available! 
This year’s Oakhill Worm Control Plan is a bit different from previous years to avoid over-worming. It consists of an Equest wormer, 3 faecal egg counts spread over the year and a tapeworm saliva test kit. 

If any of the tests come back positive, the appropriate wormer will be sent out for no extra charge, including the tapeworm-only praziquantel wormer that is no longer available from shops/online. 

Click here for further information about the Oakhill Worm Control Plan.


Poisonous Ragwort

Did you know that Ragwort is poisonous to horses, ponies and donkeys?!

If eaten, the toxins in ragwort can accumulate over time and have the potential to cause irreversible liver damage. Your horse may get just as ill from eating a small amount of ragwort over a long period as it would eating a large quantity in one go.

Signs may include:

[checklist icon=”fa-chevron-circle-right” iconcolor=”#39aa87″ circle=”yes”]

  • Lethargy and depression
  • Change in behaviour or appetite
  • Loose droppings
  • Photosensitivity with sunburn developing easily
  • A yellow appearance to gums/around the eyes
  • Significant weight loss

[/checklist]

However, there are often no signs until it is too late.


For more information on the best way to remove ragwort, please follow the link….

http://www.bhs.org.uk/our-work/welfare/our-campaigns/ragwort-toolkit/toolkit-dealing-with-ragwort-england/ragwort-removal-at-plant-stage

Image source: www.bhs.org.uk

If you’re concerned that your horse has eaten Ragwort, please contact us.

Stumpy’s corneal ulcers

Stumpy presented to equine vet Jess when his owner noticed a very swollen and closed left eye (blepharopasm) with some discharge (epiphora) after coming in from the field.

corneal ulcers

On further examination he had damaged the top surface of his eye (cornea) and several areas could be seen after applying some fluorescein dye. This is a very clever dye that will show up as green when it sticks to areas of the cornea that are damaged or ulcerated (see top left image).

Stumpy started different types of eye drops to help promote healing of these lesions and some very strong anti-inflammatories and pain relief to make him feel comfortable and reduce the inflammation in the area. We also decided to put a fly mask on stumpy during turnout to prevent him making it any worse!

However after several weeks Stumpy’s corneal ulcers were not healing as quickly as they should and had developed into a chronic condition. New cells in the top layers were not adhering to lower layers and a very irregular surface was developing (see top right Image). This required a procedure called corneal debridement with a motorised diamond burr to remove any unhealthy tissue from the corneal surface and speed the healing process.

Video shows Corneal Debridement procedure:

[youtube id=”_qxb3UpYONU” width=”600″ height=”350″ autoplay=”no” api_params=”&rel=0 “]

The image on the bottom left shows a much clearer and brighter eye with unhealthy cells removed. The last image shows a completely healed cornea with no ulceration and a shiny smooth regular surface. Result!

Stumpy and his lovely owner have done so well over the last few months as he hasn’t been the easiest to treat with eye drops. We are all so pleased that he is back to normal and enjoying his retirement.